Based on the quartz and ccm-publisher plugins, publish Obsidian notes to GitHub Pages.
- Use
submoduleto completely separate the compilation and publishing of blog content, making it more flexible and convenient.
Tip
- This article uses
quartz_demoas the compilation library for Quartz.- In practical applications, your repository name (compilation repo) should be
yourname.github.io- Use
content_demoas the notes repository, here we’re usingcontent_demofor illustration.
TLDR
- Prepare the Quartz environment, refer to Quartz: Get Started, as the compilation library.
- Pay attention to modifying the baseUrl to
yourname.github.ioin thequartz.config.tsconfiguration file,base_urlitem.
- Pay attention to modifying the baseUrl to
- Prepare an empty repository for uploading your notes (notes repository).
- At least one index.md file is required in the root path.
- Copy GitHub Action configuration files.
- Copy and configure this action configuration file to the compilation library.
- Copy and configure this action configuration file to the notes repository.
- Try pushing notes to the notes repository and check if both libraries’ actions succeed.
- Once all actions have been executed successfully, go to
yourname.github.ioto see the effect.
Operation Steps
Preparation of Environment
- Prepare the Quartz environment, refer to Quartz: Get Started.
- Initialize your own Quartz compilation library, which should be called
yourname.github.io, replacingyournamewith your GitHub account name.- Refer to Quartz: Setting up your GitHub repository.
- Up to this point, running
git remote -vlocally will yield the following result:- quart_demo1 (quartz_demo is for illustration purposes; replace it with
yourname)
- quart_demo1 (quartz_demo is for illustration purposes; replace it with
$ git remote -v # Replace quartz_demo with your own yourname.github.io origin git@github.com:CatCodeMe/quartz_demo.git (fetch) origin git@github.com:CatCodeMe/quartz_demo.git (push) upstream https://github.com/jackyzha0/quartz.git (fetch) upstream https://github.com/jackyzha0/quartz.git (push) - As with previous steps, initialize another empty repository on GitHub, used for uploading your Obsidian notes, let’s call it
content_demo2.- Only initialization is needed here; no further operations are required, like this:
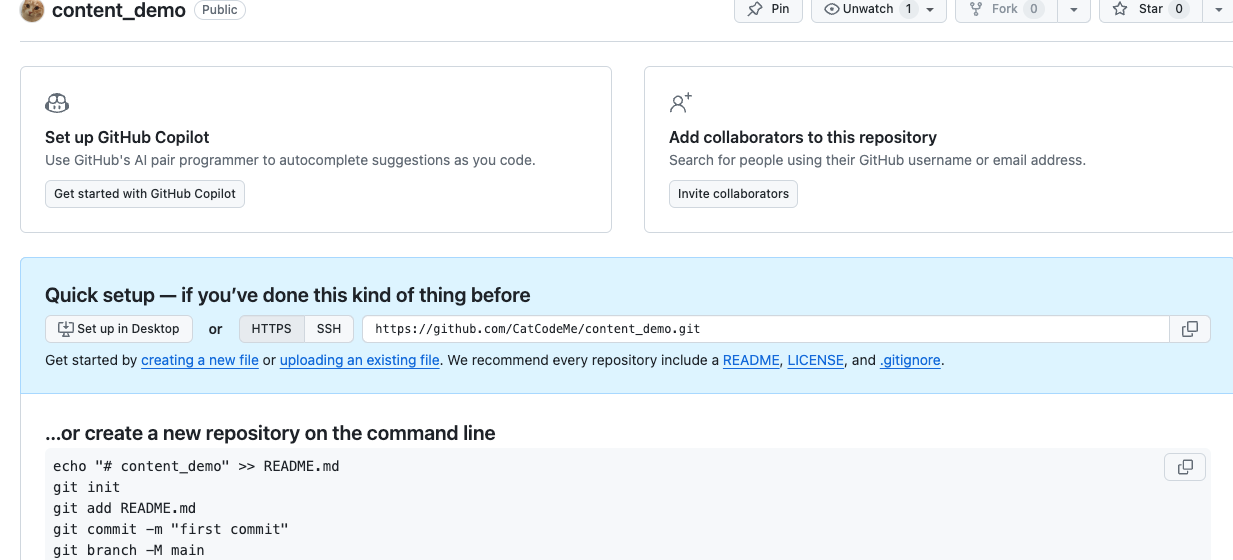
- Only initialization is needed here; no further operations are required, like this:
Configure Submodule
- Starting from this step, distinguish from the official single-library publishing method. We’ll use
submodule. - Configure submodule.
$ cd quartz_repo
$ git rm -r --cached content
# Replace CatCodeMe/content_demo.git with the path to your own repository
$ git submodule add git@github.com:CatCodeMe/content_demo.git content
$ git commit -m "add submodule"
$ git push- At this step, the
quartz_demorepository and thecontent_demorepository are connected using submodule; the blue links may be different, which is normal. If clicking on the content folder takes you to thecontent_demorepository, it means the configuration is successful.

Configure GitHub Actions for Automatic Compilation
For beginners, you can follow the subsequent steps. If you are familiar with the github action , you can directly refer to and adjust these files. notes repo action config and compilation repo action config
Configure Notes Repository (content_demo)
You can do it directly on GitHub, or if you prefer Git client tools, you can clone it to your local machine for operation.
Create a new file (click the create a new file blue link above), called .github/workflows/deploy.yml.
- The folder path must be
.github/workflows, and the file extension must be.yml. The filename doesn’t matter as long as it meets GitHub’s requirements. - For
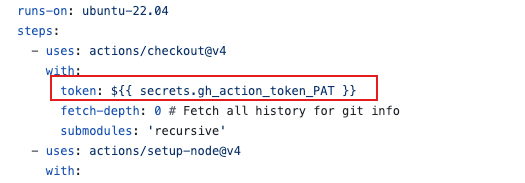
deploy.yml, you can refer to deploy.yml; after copying and modifying the content, click thecommitbutton in the upper right corner to save the current file.
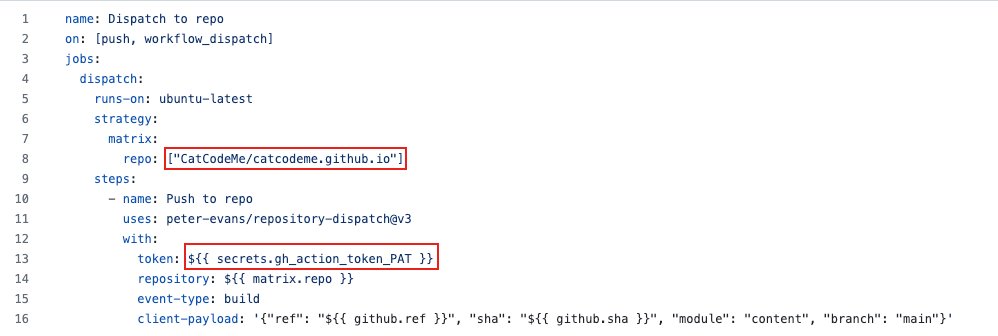
- Replace
repooption with the name from step 2, structured asyourname/yourname.github.io. - The
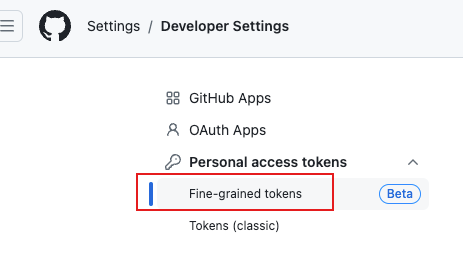
tokenoption is the GitHub authentication token, pay attention when using it.${{ secrets.gh_action_token_PAT}}In this setting,gh_action_token_PATis a custom token name that you can decide on. It’s better not to use Chinese or spaces.- Generate the token here (it’s better to open it in a new tab in your browser for convenience).
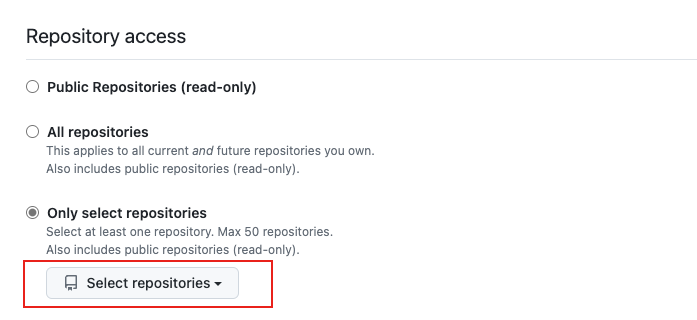
- Choose which repositories this token can access.
- Set token permissions; scroll down on the current page; expand
Repository permissions, findActionsandContents, and set Access toRead and write. - Click
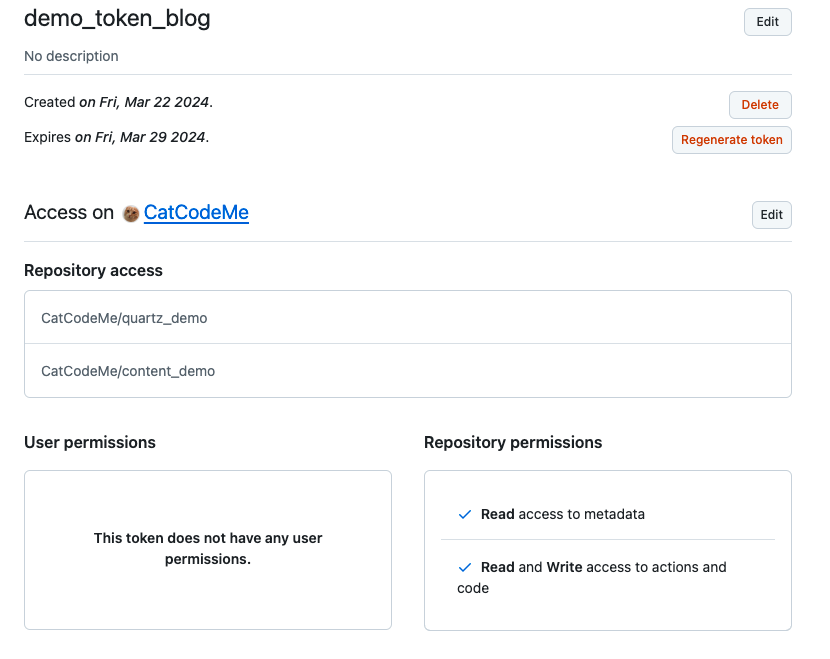
generate token(❗️Copy and save this generated token somewhere else first, as you will need it later). If you forget, you can redo steps 3-5 to generate a new token. - After copying it, you can refresh the page or click the left navigation bar again to enter the
Fine grained tokenspage, select and click on the token you just generated, and you will see something similar to the screenshot below.
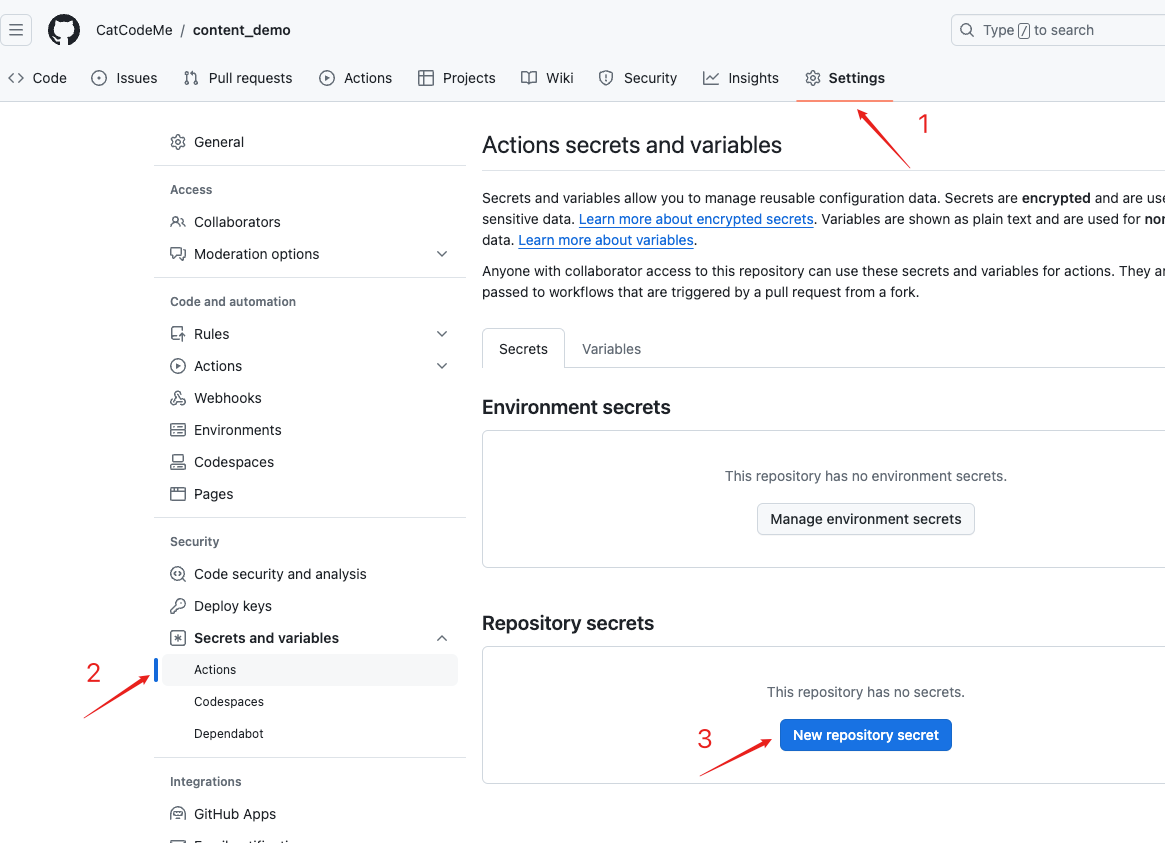
- Go back to the homepage of the repository
content_demo, click thesettingstab, enter the settings page, and add the authorization of the token you just generated to the current repository. ClickNew repository secretbutton.
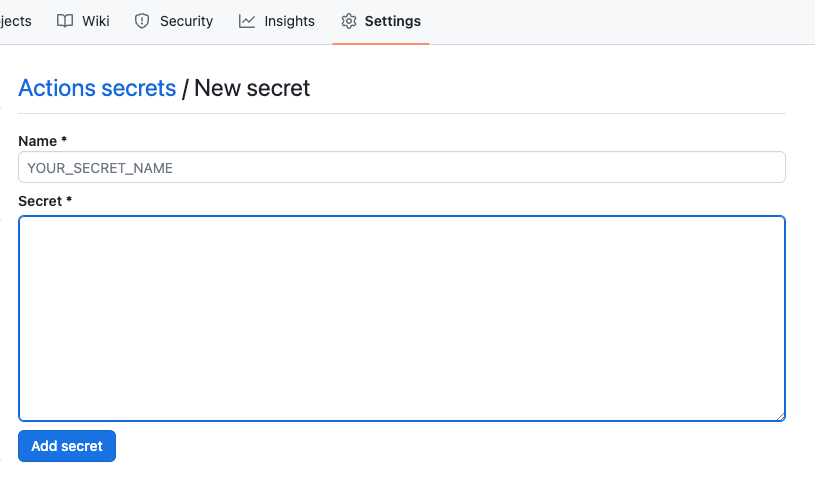
- Add TokenNext, add the token, pay attention to:
- The
Namemust be consistent with thegh_action_token_PATname in acition config file(.yaml). Of course, if you are using a different name, just modify the configuration of.github/workflows/deploy.ymlto match theNamehere. - The
Secretis the token you copied and saved earlier. - Once set, click
Add secretto save.
- The
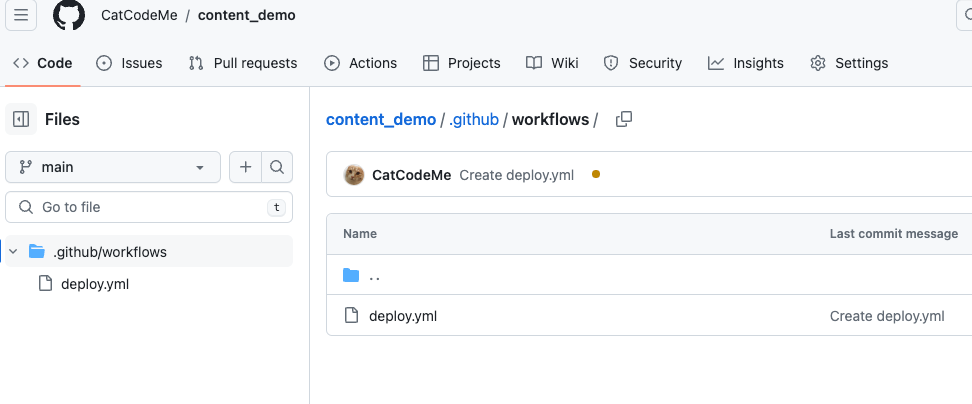
- Once this is done, the actions for the current repository should be configured. At this point, the repository structure should look like this:
- Replace
Configure Quartz Compilation Repository
- Go back to the
quartz_demorepository and directly modify theci.yamlfile content after cloning the original repository (quartz).- Like the notes repository, this file must also be in the
.github/workflows/folder, with no specific name requirements. - You can either overwrite the content of
ci.yamldirectly or delete it and create a new YAML configuration file.
- Like the notes repository, this file must also be in the
- Here, we choose to modify it.
- Use the content after modification from my configuration file.
- only on point need to update,
token name,gh_action_token_PATneed to same as your config
Configuration Completion
- With all configurations completed, try publishing notes to the
content_demorepository and check if the actions (which by default will send notifications to your GitHub email) are successful. - Then, check your target webpage at
https://yourname.github.io.
Pros and Cons
Pros
- Using the submodule pattern enables complete separation between notes and compilation tools. Even if you migrate to other tools later, theoretically there should be no impact.
- All processes are automated after configuration. All you need to do is write notes, publish them to the notes repository, and wait for them to take effect.
- You can use Obsidian’s plugin for publishing notes; here, I recommend my own developed ccm-publisher plugin.
Cons
- Does not support local preview; this can be resolved with Obsidian plugins.
- The ccm-publisher plugin is currently under development for this feature, so stay tuned.